安装
在mac上安装ansible
1. root下执行pip install ansible
报错:
liukaideMacBook-Pro-2:~ liukai$ pip install ansible
Collecting ansible
Could not fetch URL https://pypi.python.org/simple/ansible/: There was a problem confirming the ssl certificate: [SSL: TLSV1_ALERT_PROTOCOL_VERSION] tlsv1 alert protocol version (_ssl.c:590) - skipping
Could not find a version that satisfies the requirement ansible (from versions: )
No matching distribution found for ansible
原因:pip --version版本为9,通过命令curl https://bootstrap.pypa.io/get-pip.py | python将pip升级为10后执行上述命令
其它安装方式参考http://www.ansible.com.cn/docs/intro_installation.html#installing-the-control-machine

安装成功
2. 执行命令 ping 你的所有节点
在/etc/ansible目录下创建名为hosts的文件,内容为 www.liu-kevin.com
执行命令ansible all -m ping 失败
sh-3.2# ansible all -m ping
The authenticity of host 'www.liu-kevin.com (39.106.38.76)' can't be established.
ECDSA key fingerprint is SHA256:kVdvllvZWXtuObQ8pzRZYsWhCBcETiIfhYOJ37Fu+sk.
Are you sure you want to continue connecting (yes/no)? yes
www.liu-kevin.com | UNREACHABLE! => {
    "changed": false,
    "msg": "Failed to connect to the host via ssh: Warning: Permanently added 'www.liu-kevin.com,39.106.38.76' (ECDSA) to the list of known hosts.\r\nPermission denied (publickey,gssapi-keyex,gssapi-with-mic,password).\r\n",
    "unreachable": true
}
原因:未将密钥添加到ssh-agent的高速缓存
使用命令ssh-add /Users/liukai/.ssh/id_rsa_personal添加密钥
然后再执行上述命令成功
sh-3.2# ansible all -m ping
www.liu-kevin.com | SUCCESS => {
    "changed": false,
    "ping": "pong"
}
Ansible会像SSH那样试图用你的当前用户名来连接你的远程机器.要覆写远程用户名,只需使用’-u’参数. 如果你想访问 sudo模式,这里也有标识(flags)来实现:
# as bruce   bruce为完程机器上的用户名
$ ansible all -m ping -u bruce
# as bruce, sudoing to root
$ ansible all -m ping -u bruce --sudo
# as bruce, sudoing to batman
$ ansible all -m ping -u bruce --sudo --sudo-user batman
linux下安装ansible
yum install ansible
HOSTS配置
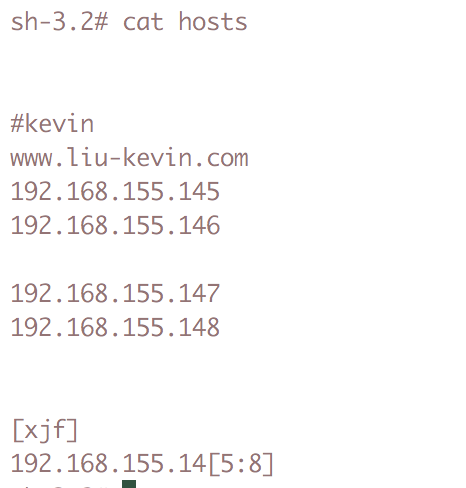
创建名为xjf的组,该组下的机器为 192.168.145、192.168.146、192.168.147、192.168.148
hosts中可以是ip 域名 或者 .ssh/config下配置的节点名
如果是.ssh/config下配置的节点名,则可通过config配置秘钥,但是如果是在ansible的hosts中直接配置ip或域名,则需要通过 ssh-add 添加秘钥信息
命令格式
ansible
ansible <host-pattern> -m <module> -a <argument>
host-pattern: all、host-group、hostname
module: shell、file、copy......
argument: 当module为shell是,该参数为shell命令,否则根据模板的参数名填入对应的值
ansible-playbook
ansible-playbook some-book.yaml
常用命令
ansible模块:
获取模块列表:ansible-doc -l
获取指定模块的使用帮助:ansible-doc -s MOD_NAME
三. ansible的模块
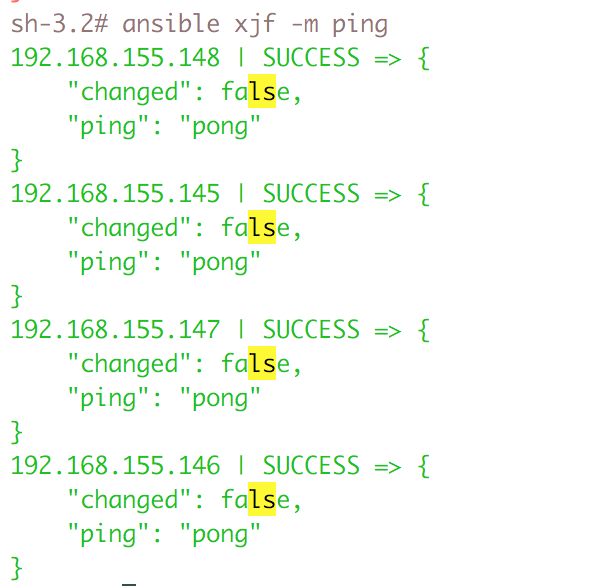
ping模块:探测目标主机是否存活;
ansible all -m ping
command模块:在远程主机执行命令;
示例1:让所有主机同步时间
此处没有给出指定的-m command命令,是因为ansible的模块默认就是command

执行shell命令
在远程主机上调用shell解释器运行命令,支持shell的各种功能,例如管道等
注意:command和shell模块的核心参数直接为命令本身;而其它模块的参数通常为“key=value”格式;
ansible raleigh -m shell -a 'echo $TERM'
ansible yx-test -m shell -a 'df -lh'  查看某组下所有节点的分区使用情况
COPY
以并行的方式同时 SCP 大量的文件到多台机器
用法:
(1) 复制文件
-a "src= dest= "
(2) 给定内容生成文件
-a "content= dest= "
ansible atlanta -m copy -a "src=/etc/hosts dest=/tmp/hosts"
使用 file 模块可以做到修改文件的属主和权限
用法:
(1) 创建目录:
-a "path= state=directory"
(2) 创建链接文件:
-a "path= src= state=link"
(3) 删除文件:
-a "path= state=absent"
$ ansible webservers -m file -a "dest=/srv/foo/a.txt mode=600"
$ ansible webservers -m file -a "dest=/srv/foo/b.txt mode=600 owner=mdehaan group=mdehaan"
使用 file 模块也可以创建目录,与执行 mkdir -p 效果类似:
$ ansible webservers -m file -a "dest=/path/to/c mode=755 owner=mdehaan group=mdehaan state=directory"
删除目录(递归的删除)和删除文件:
$ ansible webservers -m file -a "dest=/path/to/c state=absent"
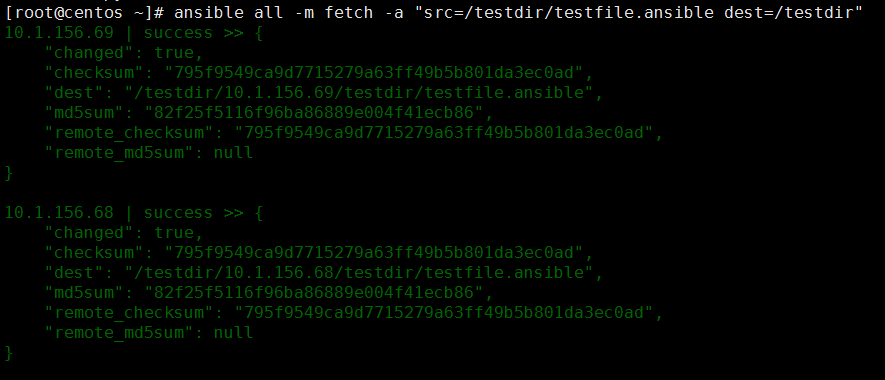
fetch模块:从远程主机拿文件
当抓去一堆文件的时候,也会创建对应的ip地址的目录,以区分文件
使用 ‘user’ 模块可以方便的创建账户,删除账户,或是管理现有的账户:
使用格式:
name= : 创建的用户名
state= : present新增,absent删除
force= : 删除用户的时候删除家目录
system= : 创建系统用户
uid= : 指定UID
shell= : 指定shell
home= : 指定用户家目录
# 添加用户
$ ansible all -m user -a "name=foo password=<crypted password here>"
# 删除用户
$ ansible all -m user -a "name=foo state=absent"
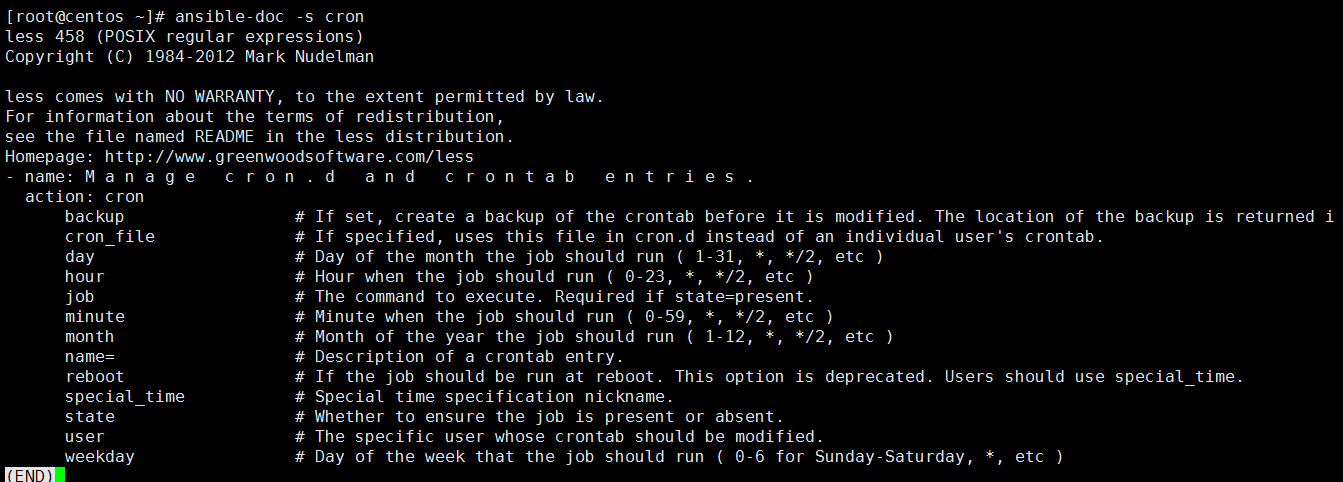
cron模块:管理计划任务条目
用法:
    -a ""
        minute=
        hour=
        day=
        month=
        weekday=
        job=
        name=
        user=
        state={present|absent}
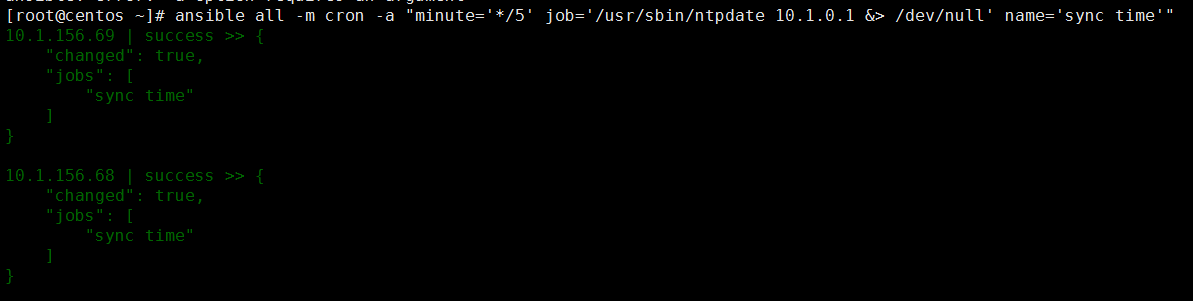
示例:创建一个同步时间的计划任务,每5分钟同步一下服务器的时间
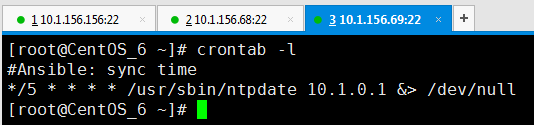
验证任务
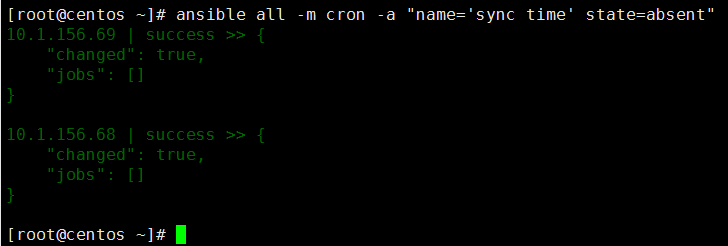
示例:删除计划任务
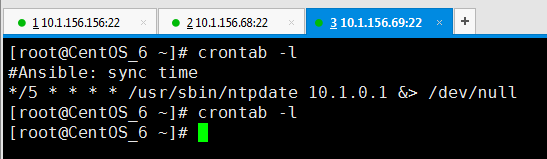
验证
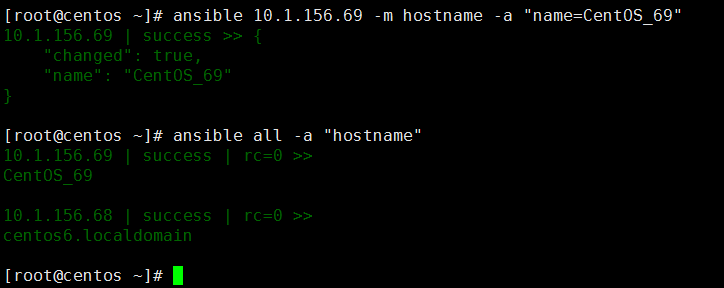
hostname模块:管理主机名
用法:
name=
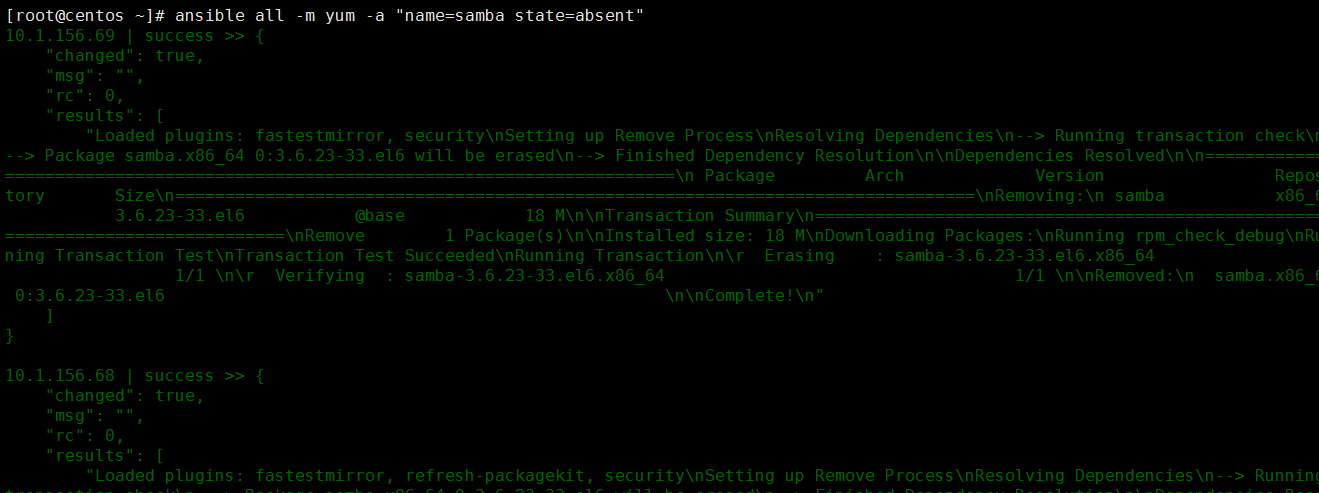
yum模块:使用yum命令完成程序包管理
用法:
    -a ""
        (1) name=  state={present|latest}
        (2) name=  state=absent

删除samba安装包
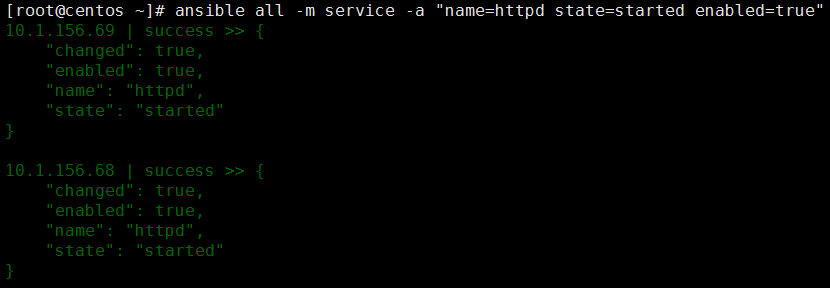
service模块:服务管理
用法:
-a ""
    name=
    state=
        started
        stopped
        restarted
    enabled=
    runlevel=
首先我们确认httpd服务是关闭的

开启httpd服务,并且设置为开机启动
验证,80端口已经开启

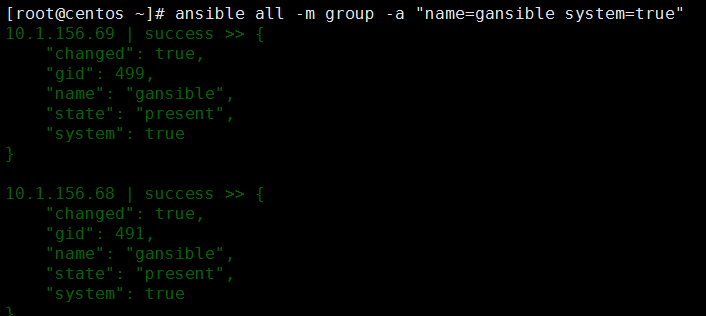
group模块:增加或删除组
用法:
    -a ""
        name=
        state=
        system=
        gid=
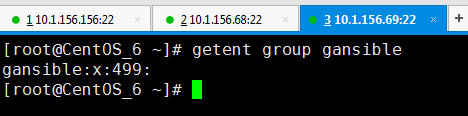
示例:添加一个组
验证
删除组

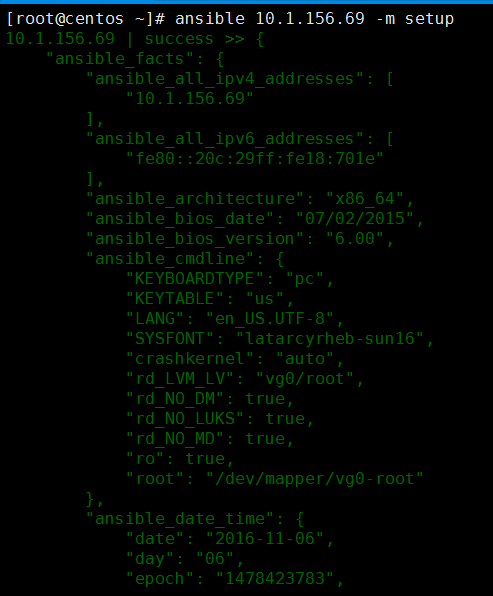
setup模块:收集主机里面的各种信息
YAML:一种数据序列化工具的语言格式
PlayBook
核心元素:
Tasks:任务,由模块定义的操作的列表;
Variables:变量
Templates:模板,即使用了模板语法的文本文件;
Handlers:由特定条件触发的Tasks;
Roles:角色;
playbook的基础组件:
Hosts:运行指定任务的目标主机;
remote_user:在远程主机以哪个用户身份执行;
    sudo_user:非管理员需要拥有sudo权限;
tasks:任务列表
    模块,模块参数:
        格式:
            (1) action: module arguments
            (2) module: arguments
运行playbook,使用ansible-playbook命令
(1) 检测语法
    ansible-playbook  --syntax-check  /path/to/playbook.yaml
(2) 测试运行
    ansible-playbook -C /path/to/playbook.yaml
        --list-hosts
        -list-tasks
        --list-tags
(3) 运行
    ansible-playbook  /path/to/playbook.yaml
        -t TAGS, --tags=TAGS
        --skip-tags=SKIP_TAGS
        --start-at-task=START_AT
playbook使用示例
定义模板
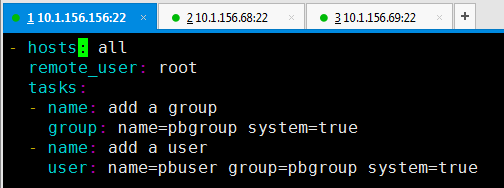
执行
ansible-playbook group.yaml